How to Edit a Product
This guide walks you through the different ways to edit products, from quick updates to full edits, helping you manage product information efficiently and with confidence.
On This Page
Quick Edit
Quick Edit allows you to make fast changes to product details directly from the list view, without opening the full editor. It’s ideal for updating basic information quickly and efficiently.
Step 1: Locate The Product
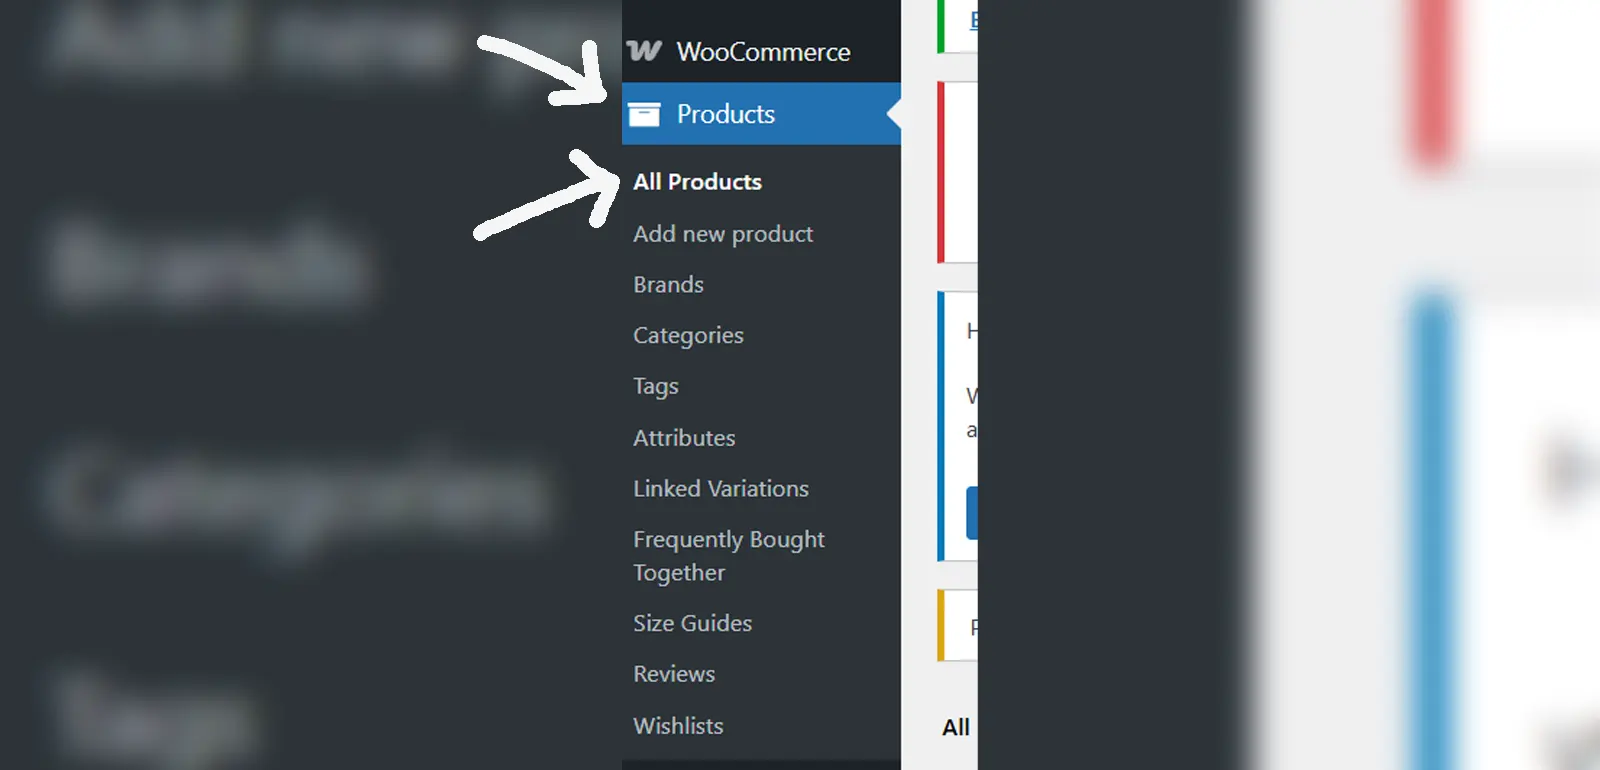
From the WordPress dashboard, go to WooCommerce → Products → All Products. This opens the full product list where you can search, filter, or scroll to find the specific product you want to update.
Step 2: Open Quick Edit
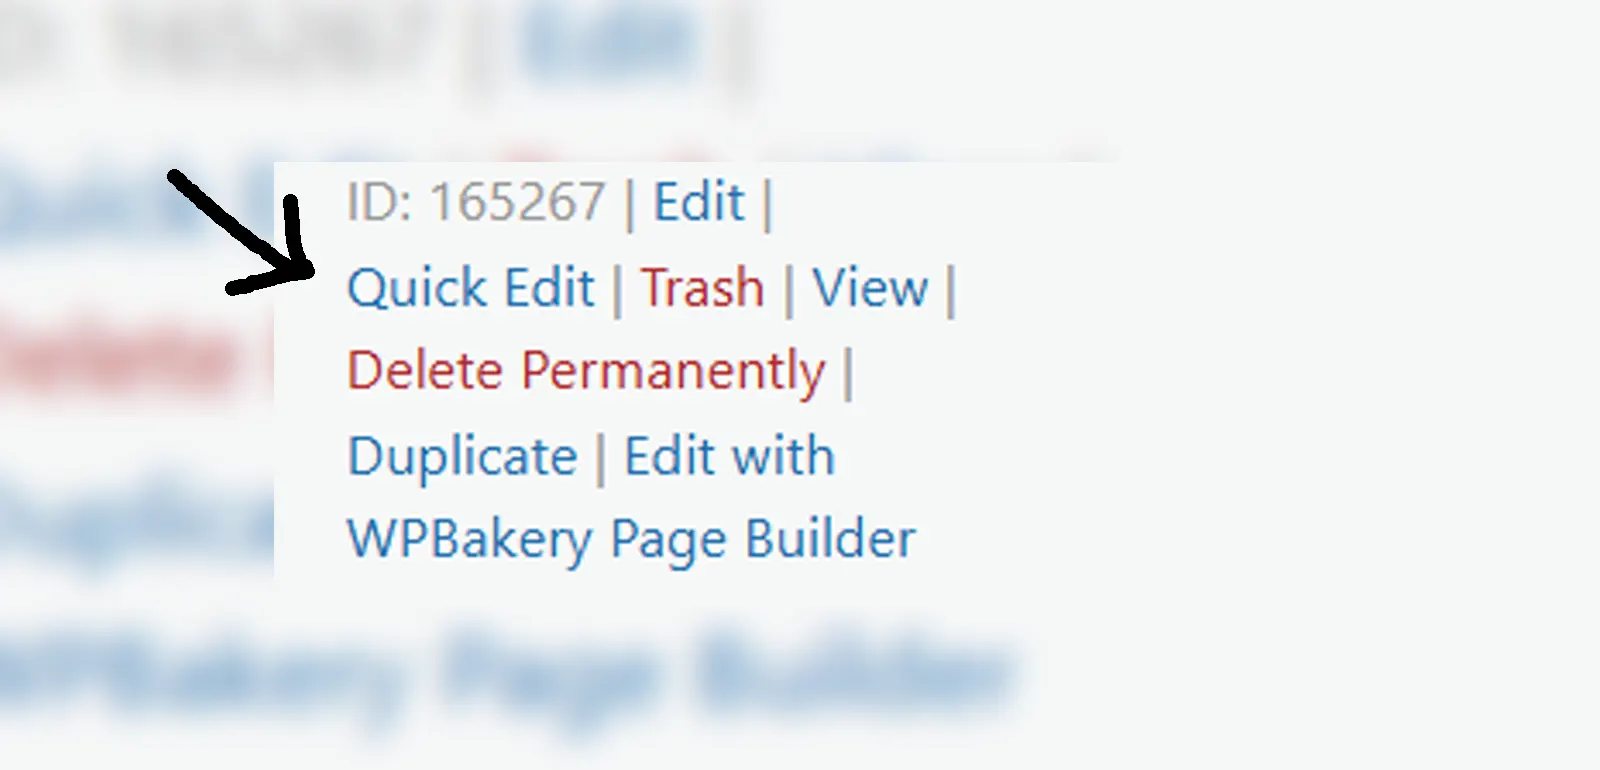
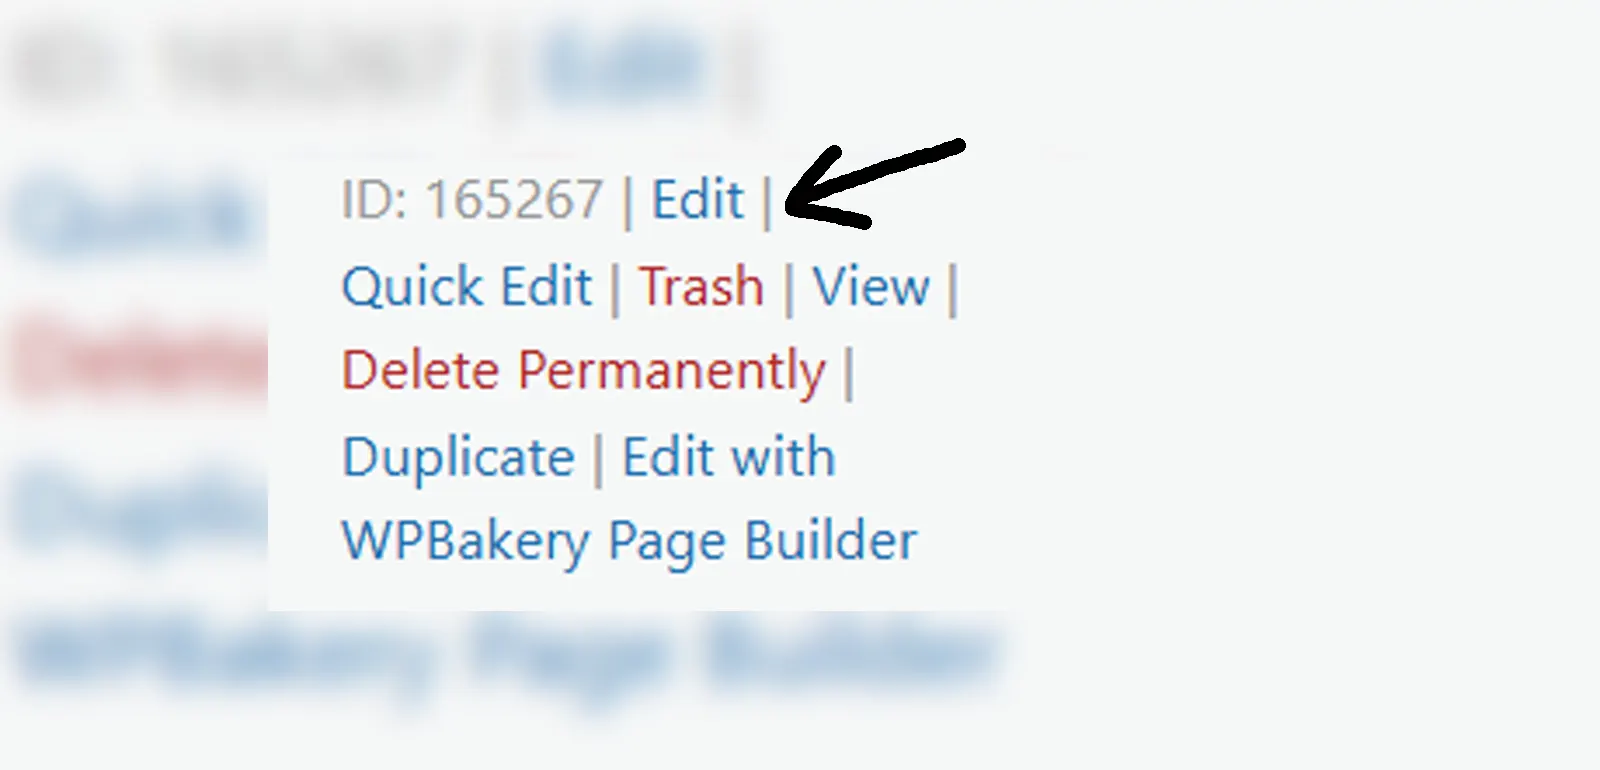
Once you find the product, hover your mouse over its name. A row of options will appear underneath, including Edit, Quick Edit, Trash, and View. Click Quick Edit to open a compact editing panel without leaving the product list page.
Step 3: Update and save changes
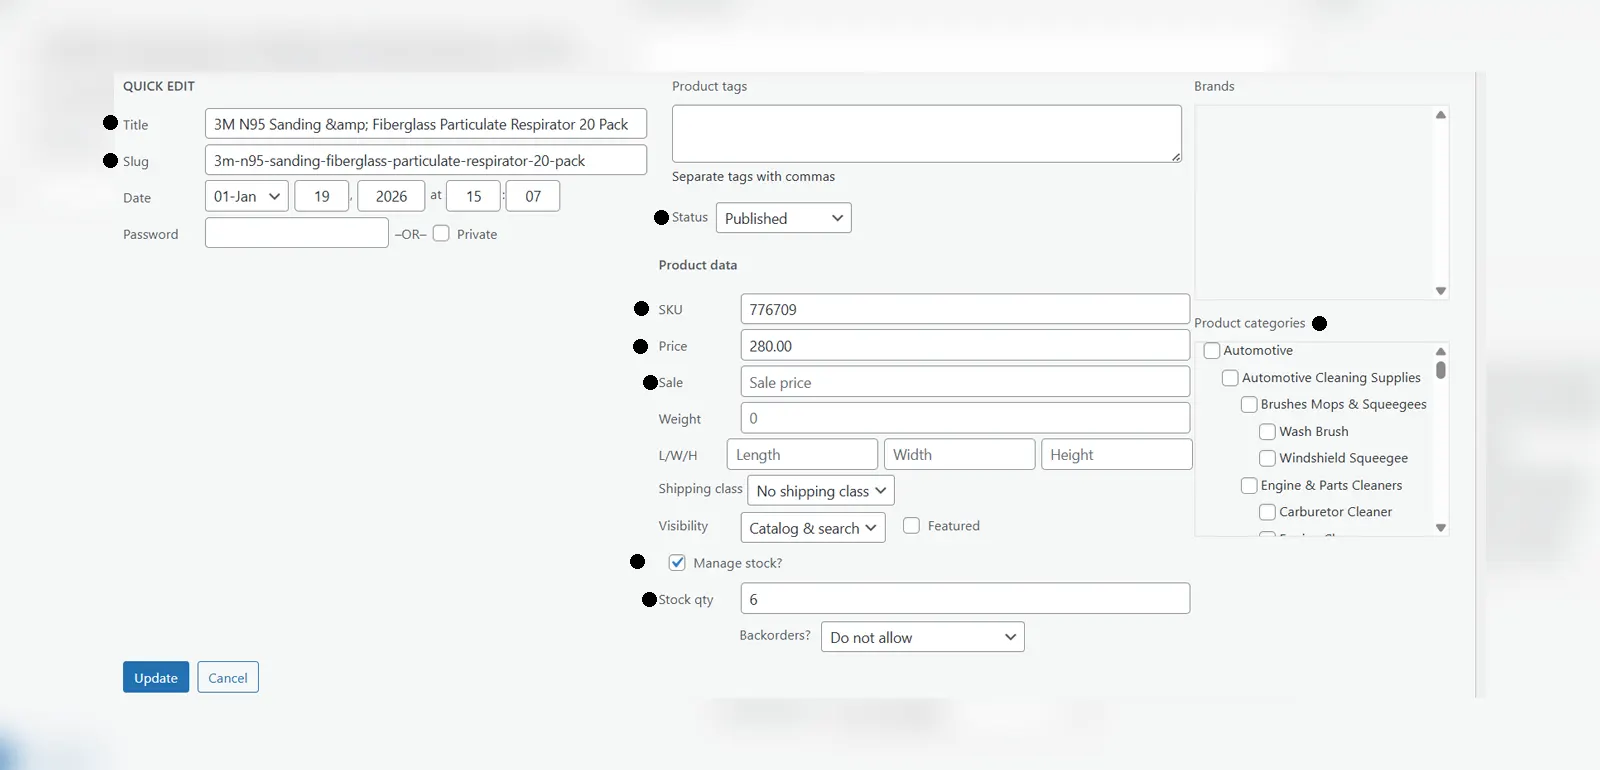
In the Quick Edit panel, you can update key details such as the product title, slug, price, SKU, stock quantity, visibility, categories, and publish status. After making your changes, click Update to save them instantly.
Full Product Edit
Full Product Edit opens the complete product editor, giving you full control over all product details, layouts, and settings for more in-depth changes.
Step 1: Locate the product
From the WordPress dashboard, go to WooCommerce → Products → All Products. This opens the full product list where you can search, filter, or scroll to find the specific product you want to update.
Step 2: Open the Editor
Once you find the product, hover your mouse over its name. A row of options will appear underneath, including Edit, Quick Edit, Trash, and View. Click Edit to open the full editing page.
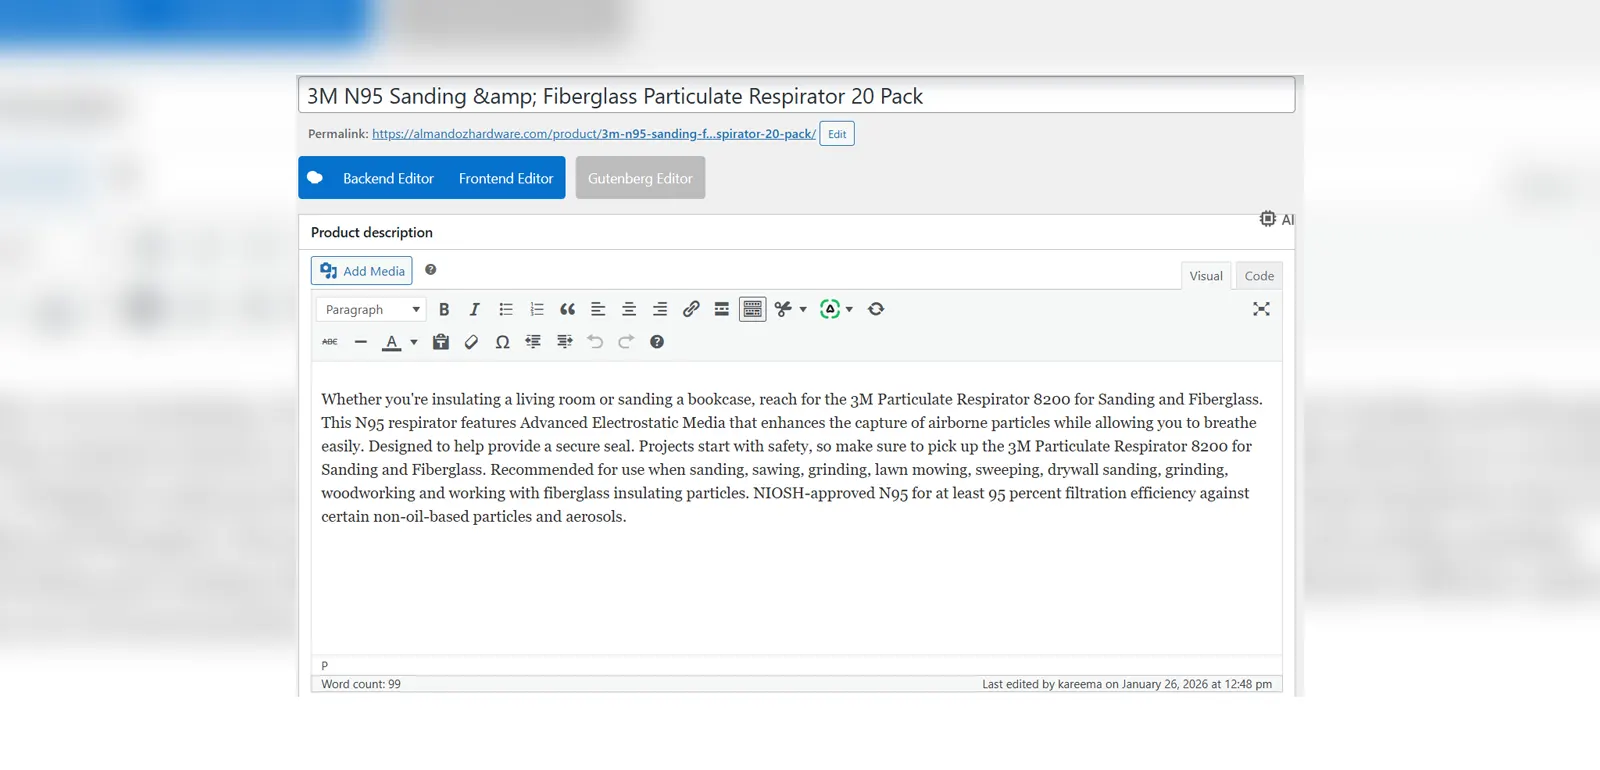
Step 3: Familiarizing yourself with the page
On this Page, you will see a myriad of different functions and features but there are a few main ones that are really needed, as they are not accessible from the “Quick Edit” panel. Such as: Description, Short Description, Product Image and Product Gallery. The standard details such as title, slug, sku, stock, categories, price and publish are all accessible from this page.
Step 4: Adding Descriptions
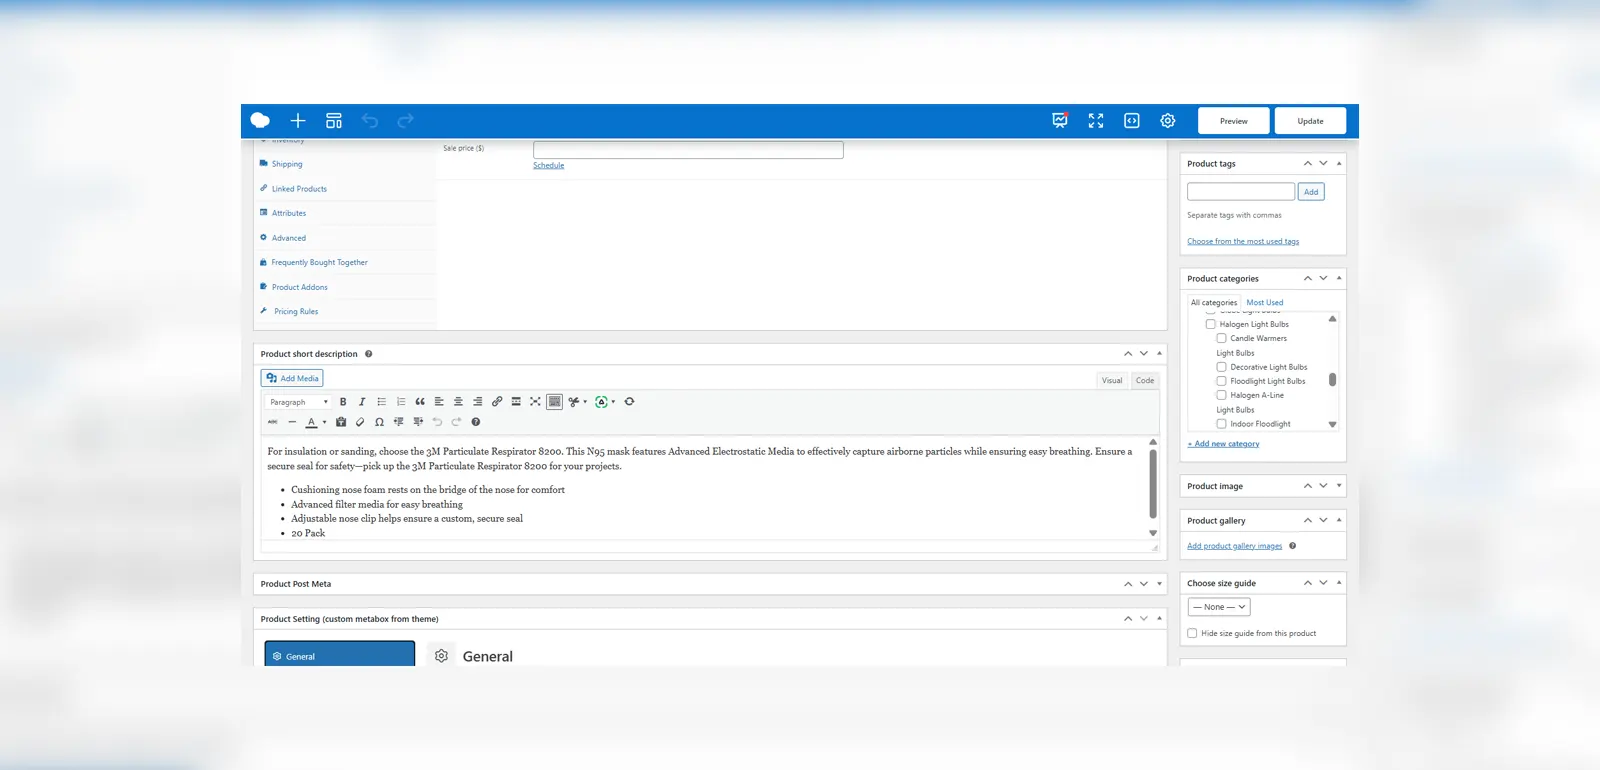
There are two types of descriptions, the classic Product Description and the Short Description which is mostly used to highlight certain product features.

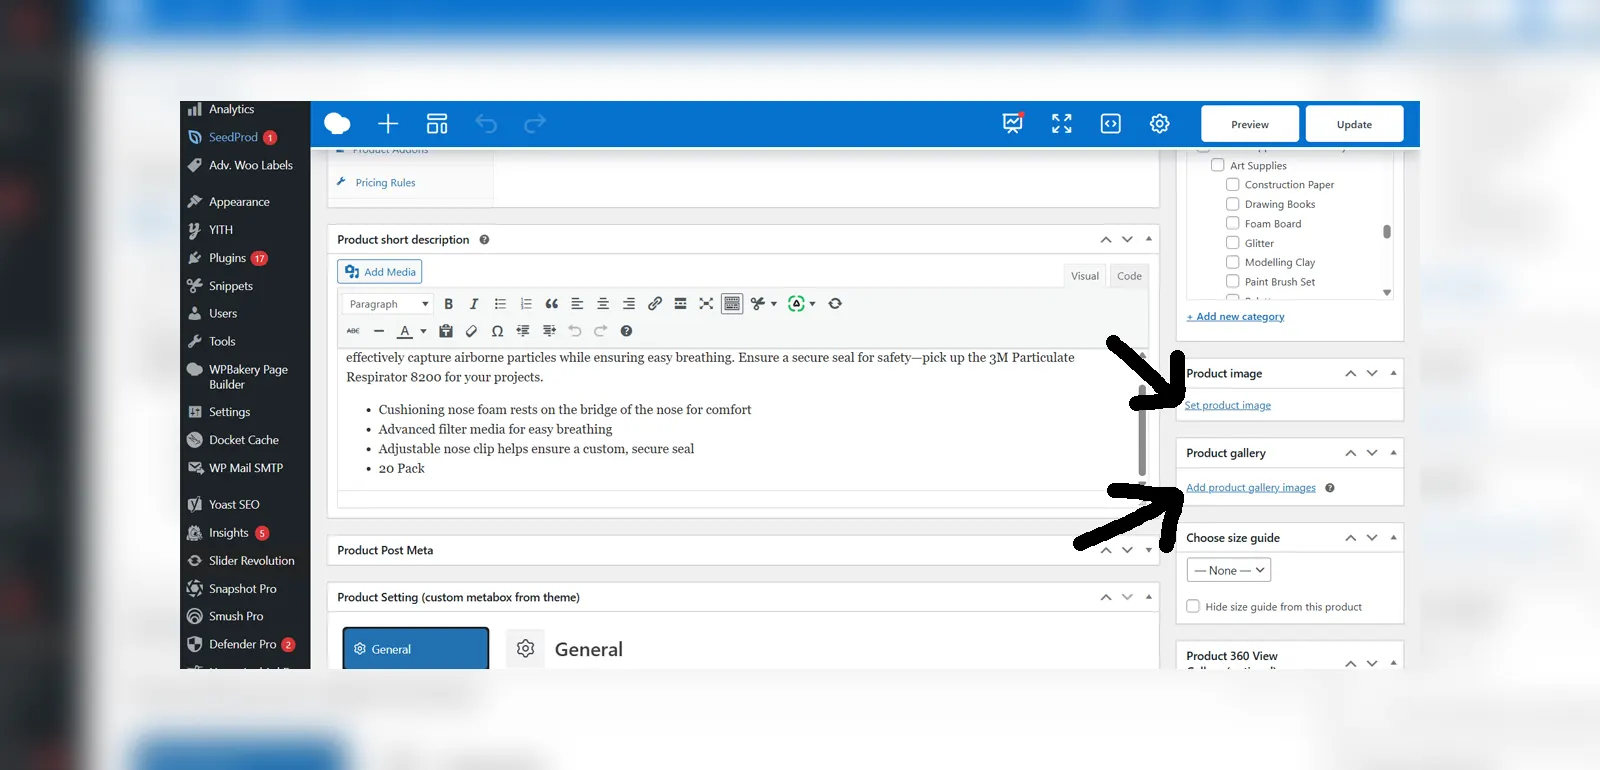
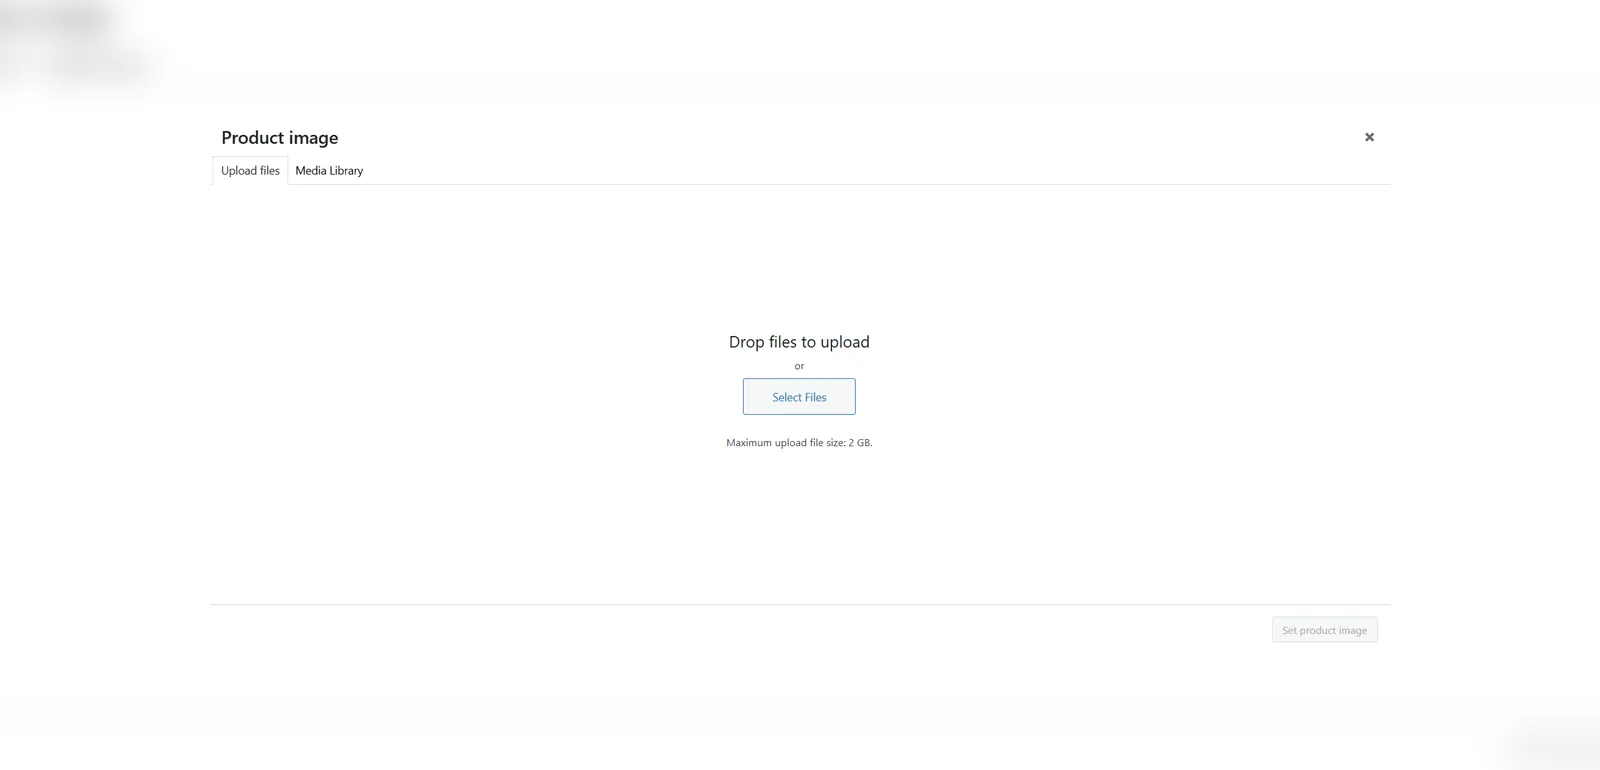
Step 5: Adding Images
There are 2 ways to add images to a product, Product Image and Product Gallery Images. Product Image is what everyone will see before they click on the product. Product Gallery Images are extra, optional images that show more detailed views on the product. Clicking on either of the blue “Add” links will open a panel where you can add an image from the “Media Library” or Upload your own. After selecting an image, click the “Add” button on the bottom right of the panel to save it.
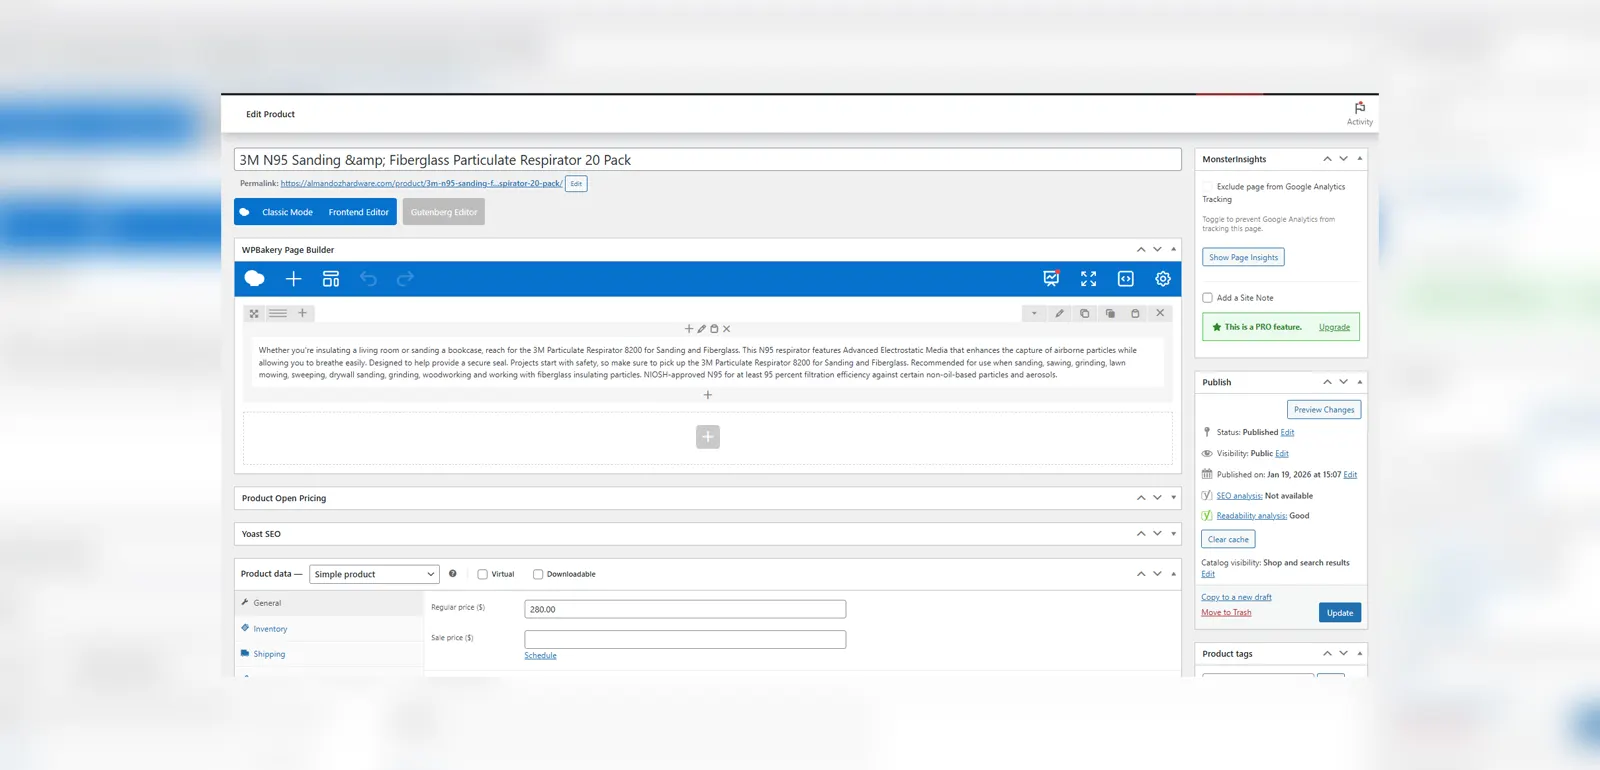
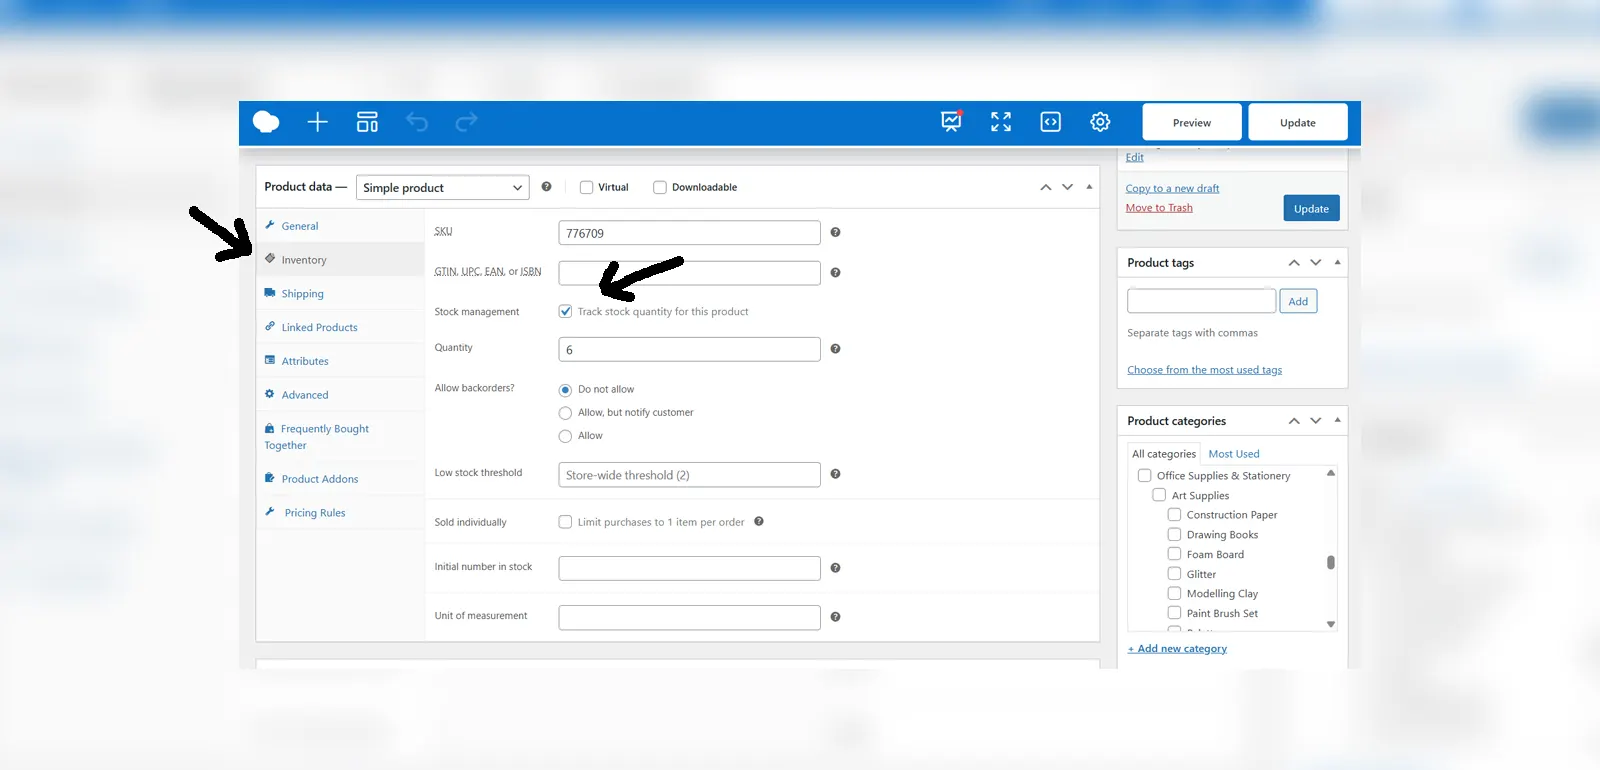
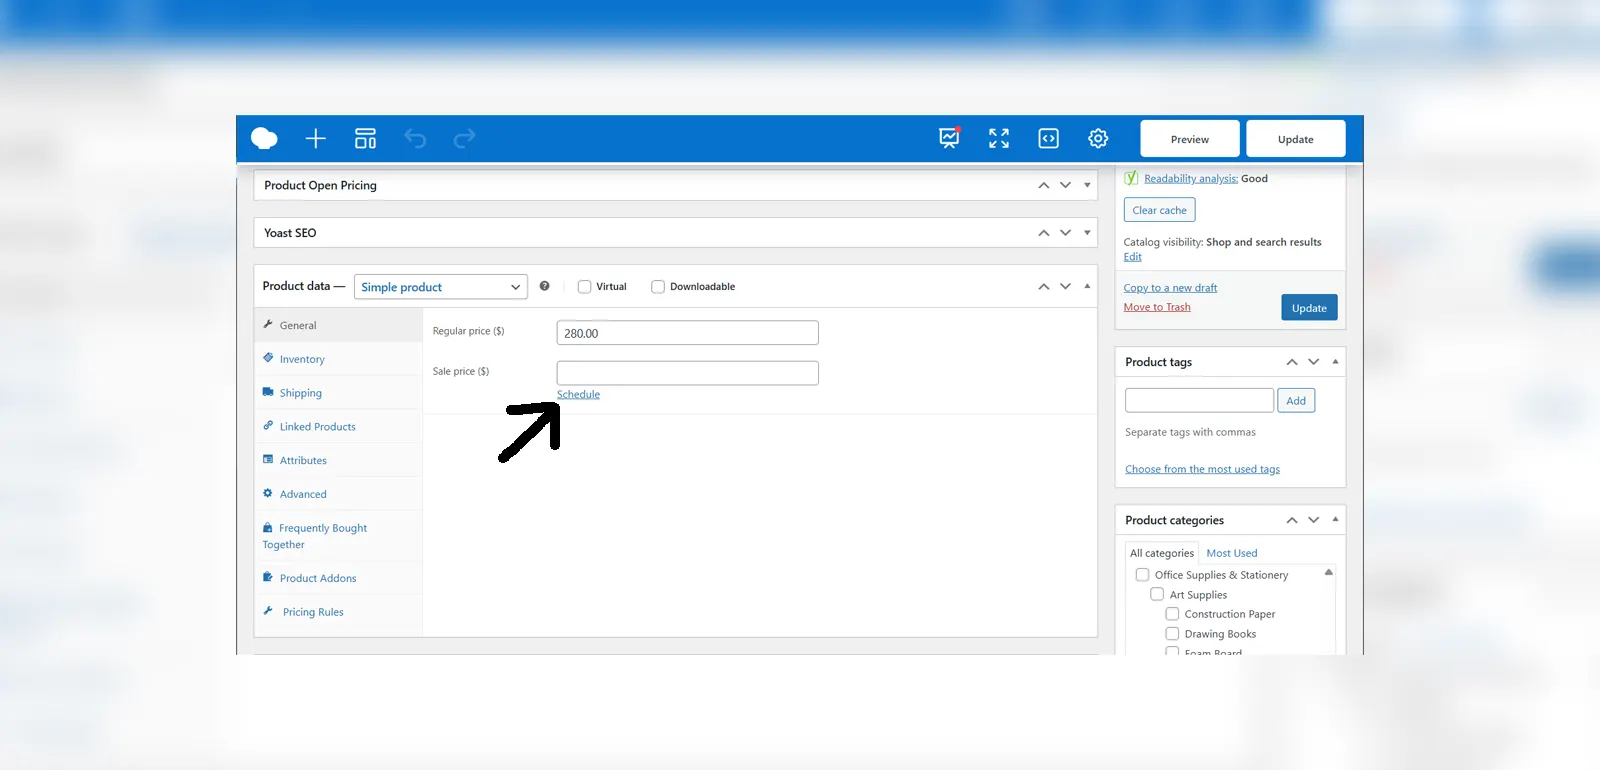
Step 6: Adding Product Information
In this section, you will see a lot of tabs and may be confused by them but there are 2 main tabs to take note of, General and Inventory. The General tab has the option to set the regular and sale price of a product. You can also schedule the date for your product’s sale here. The Inventory tab has the ability to set a SKU for a product as well as the ability to manage its stock. The “Stock Management” checkbox allows you to choose between setting a specific stock or merely its status.
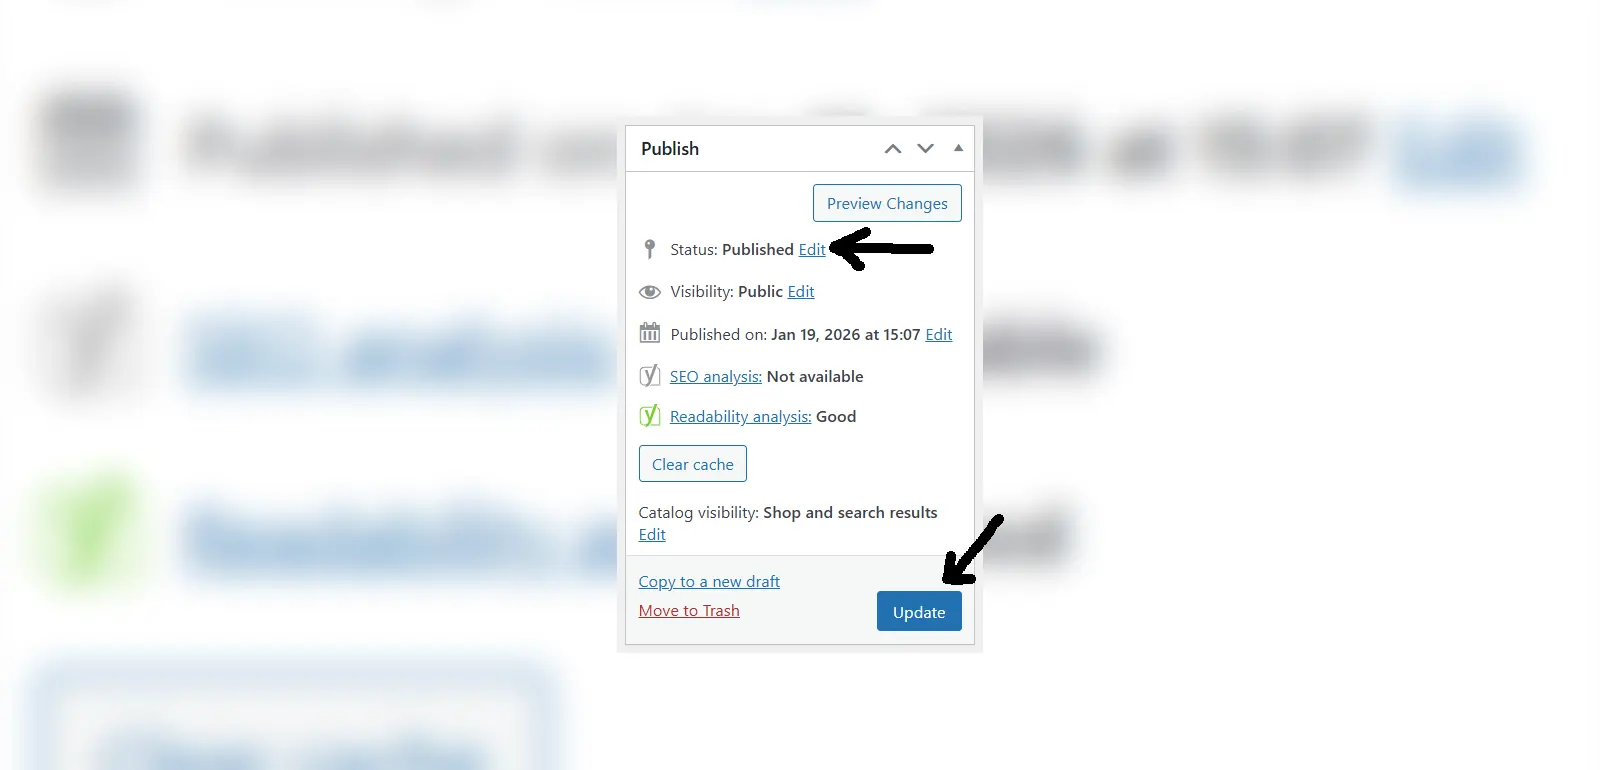
Step 7: Saving Changes
After making all of your changes, there are 2 ways to save a product, by Publishing or by Saving as Draft. Publishing means that your product will become visible across your site while Saving as Draft will ensure that your product remains private until ready to be published.