How to Edit a Product’s Information
This guide walks you through the different ways to edit a product’s information, from quick updates to full edits, helping you manage product information efficiently and with confidence.
On This Page
How to edit Product Title
Step 1: Navigate to Product Edit (or Quick Edit)
- From the left-hand dashboard menu, hover over Products.
- Click All Products.
You will now see the Product page.
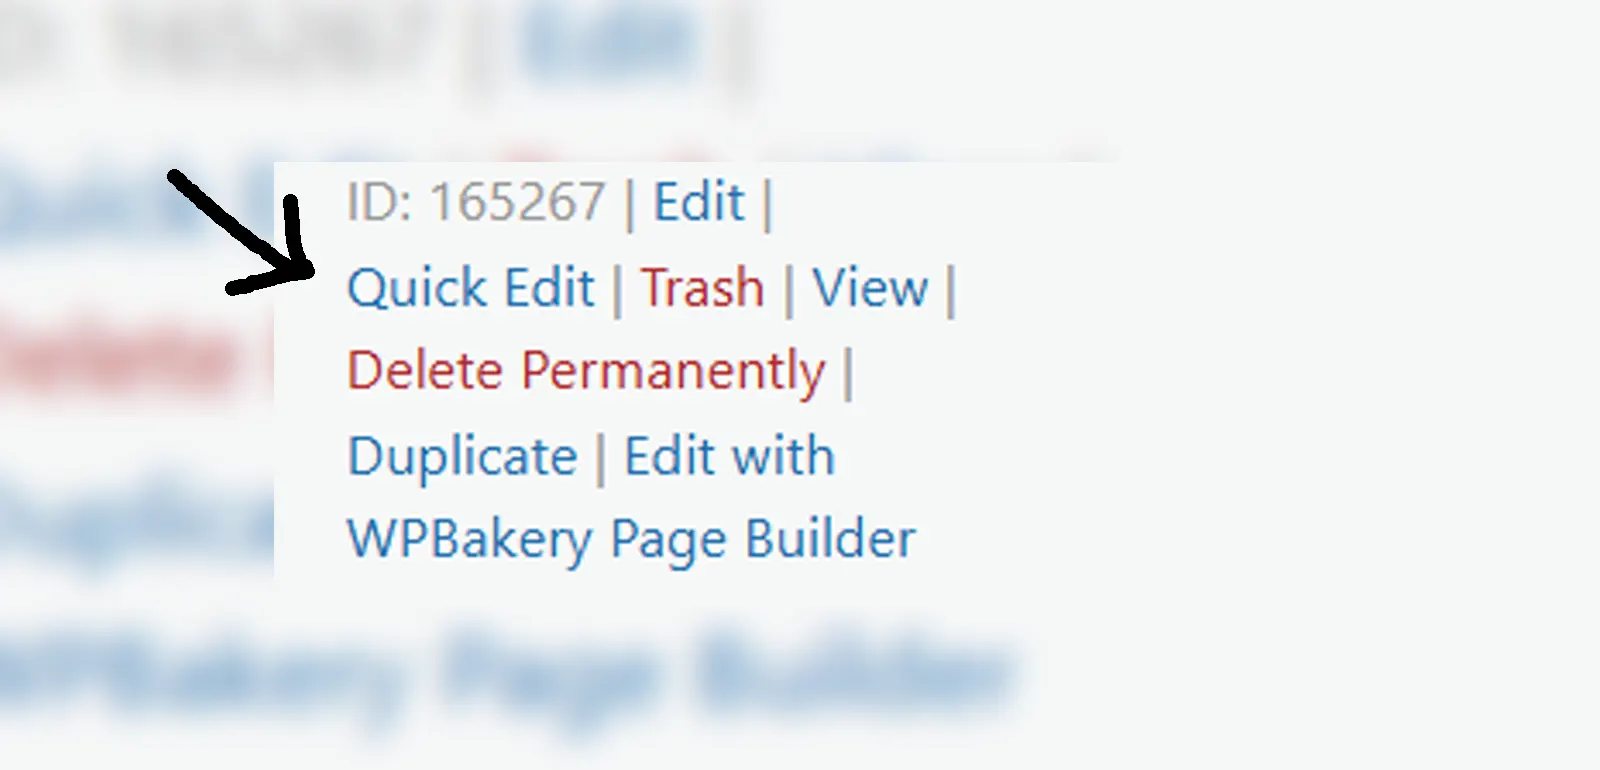
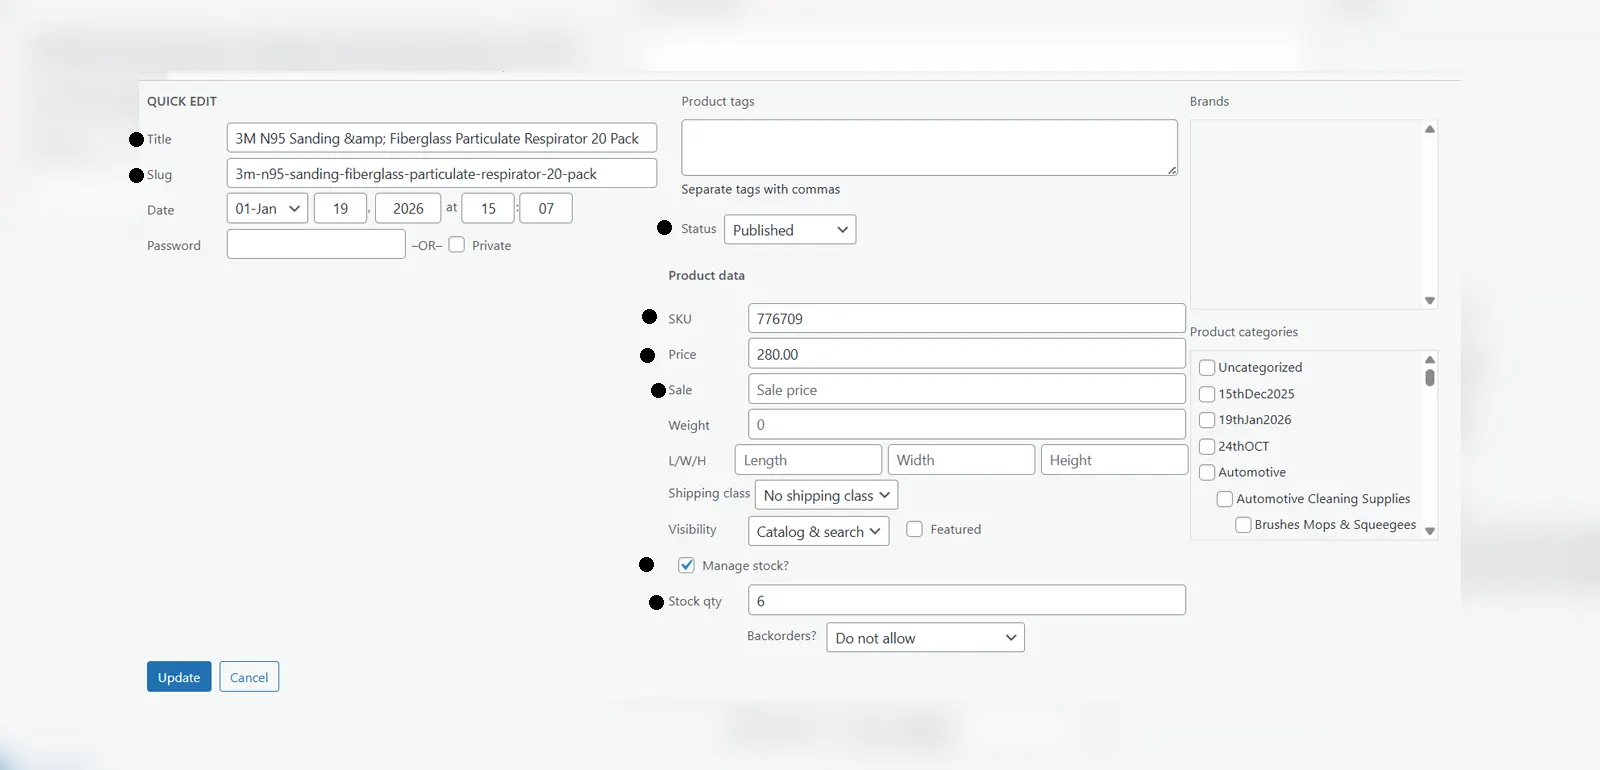
The Products page allows you to see all existing products. Hovering over one of the products will provide some options. Select Quick Edit to open a panel where you can edit your product’s Name and Slug easily by clicking inside the respective fields.
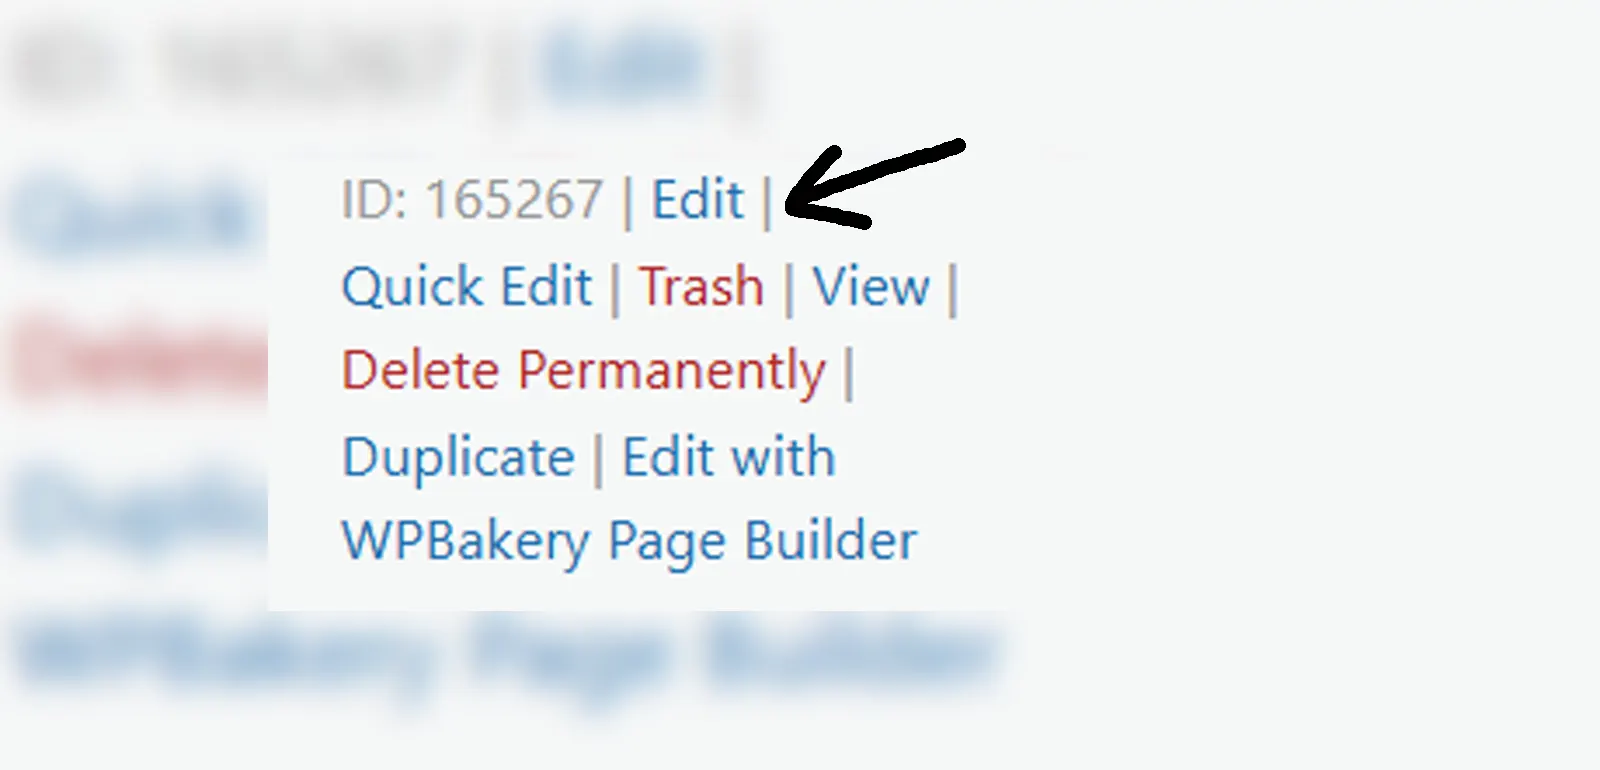
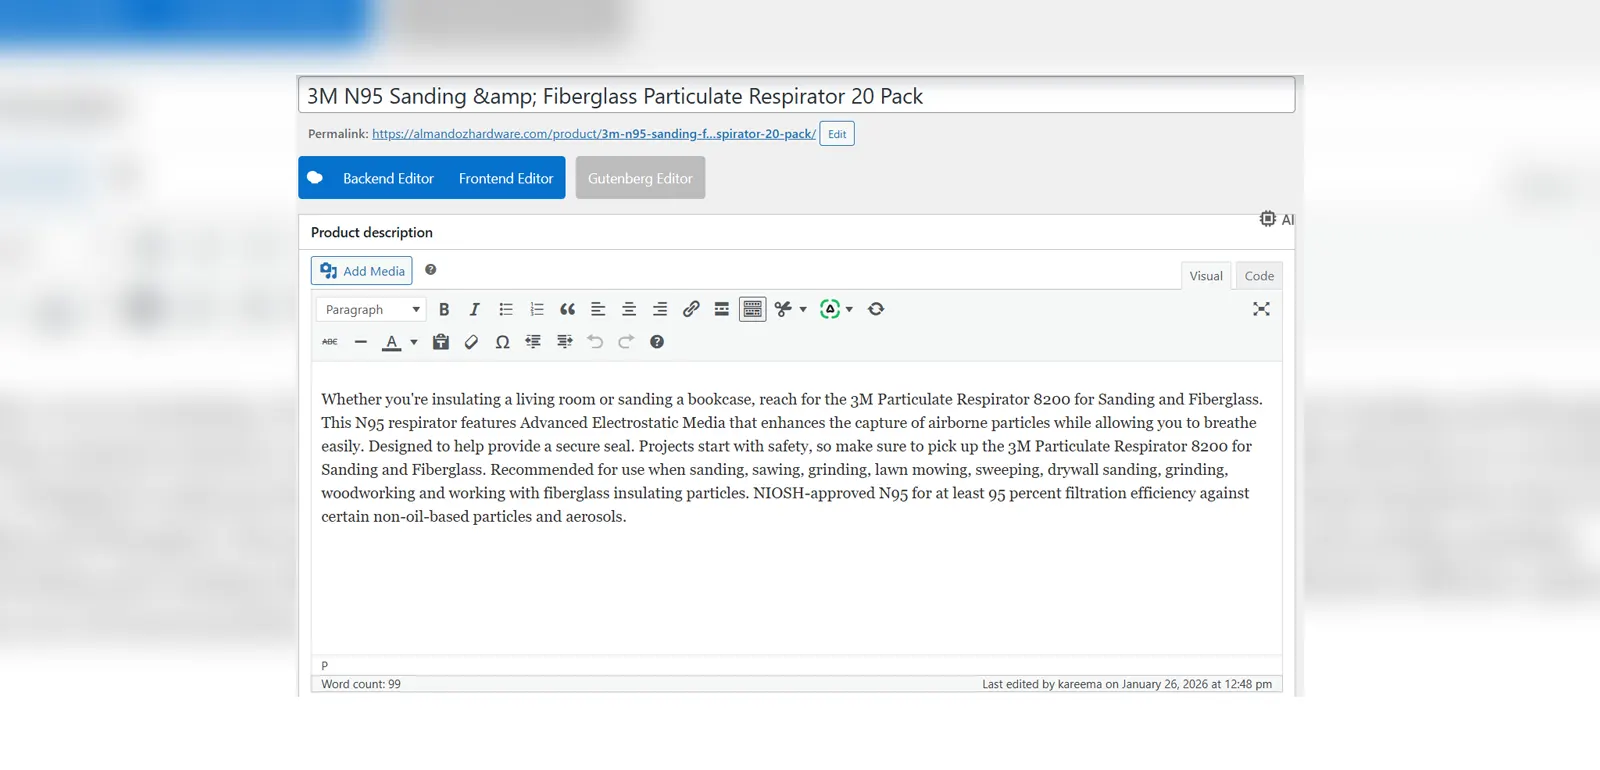
Select Edit to open a page where you can also edit the product’s name and slug. Click on the title field at the top to make any changes and select the Edit button next to the Permalink to change the slug. Save changes by clicking Update.
How to edit Description
Step 1: Navigate to Product Edit
- From the left-hand dashboard menu, hover over Products.
- Click All Products.
You will now see the Products page.
Hover over your product and select Edit. From there, scroll down to Product Description and enter/change the information as needed. Scrolling down further will allow you to find the Short Description field, usually near the Product Data field. Enter/Change the information there as needed. Once finished, proceed to the click the Update on the right side of the page to save changes.
How to edit Short Description
Step 1: Navigate to Product Edit
- From the left-hand dashboard menu, hover over Products.
- Click All Products.
You will now see the Products page.
Hover over your product and select Edit. From there, scroll down to Short Description field, usually near the Product Data field. Enter/Change the information there as needed. Once finished, proceed to the click the Update on the right side of the page to save changes.

How to edit a Product's Price
Step 1: Navigate to Product Edit
- From the left-hand dashboard menu, hover over Products.
- Click All Products.
You will now see the Products page.
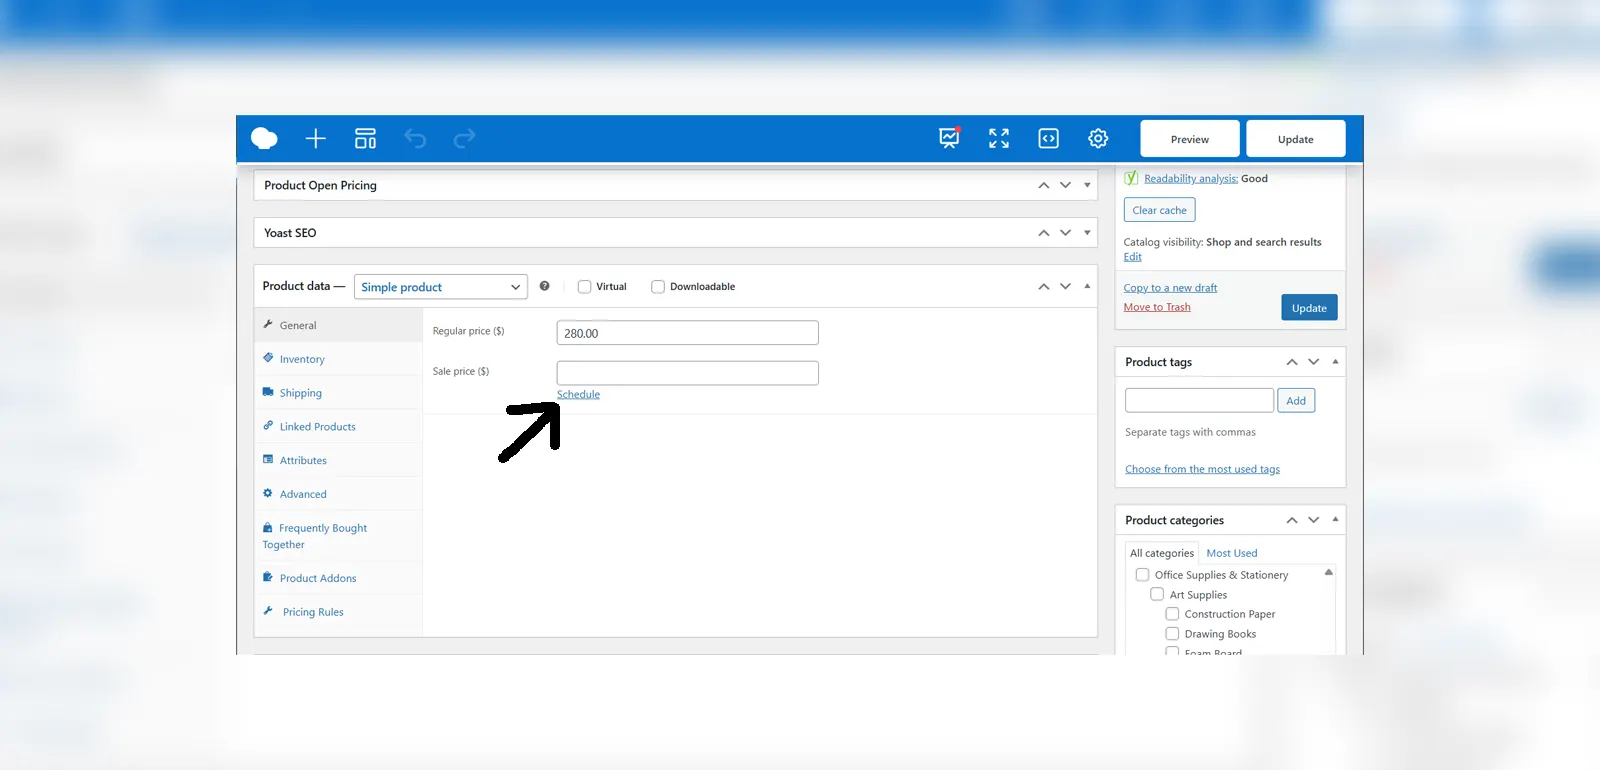
Hover over your product and select Edit. From there, scroll down to Product Data and select the General tab.
Regular Price: The standard price of a product.
Sale Price (optional): Discounted Price of a product
Schedule (optional): Allows you to set the start and end dates for your sale as needed.
After entering the necessary information, proceed to click the Update button on the right side of the page to save changes.
How to edit a Product's Stock
Step 1: Using Quick Edit (for Simple Products)
On your dashboard, locate WooCommerce > Products. From there, hover over your product and click on Quick Edit. This will open up a panel that allows you to edit multiple fields easily. Locate the “In Stock?” field. Above that field is a checkbox called “Manage Stock” which, on selecting it, allows you to enter a specific stock quantity for your product instead. After entering your stock, click on the Update button at the bottom.
NOTE: This does not work for variable products.
Step 2: Using Full Edit (for Variable Products)
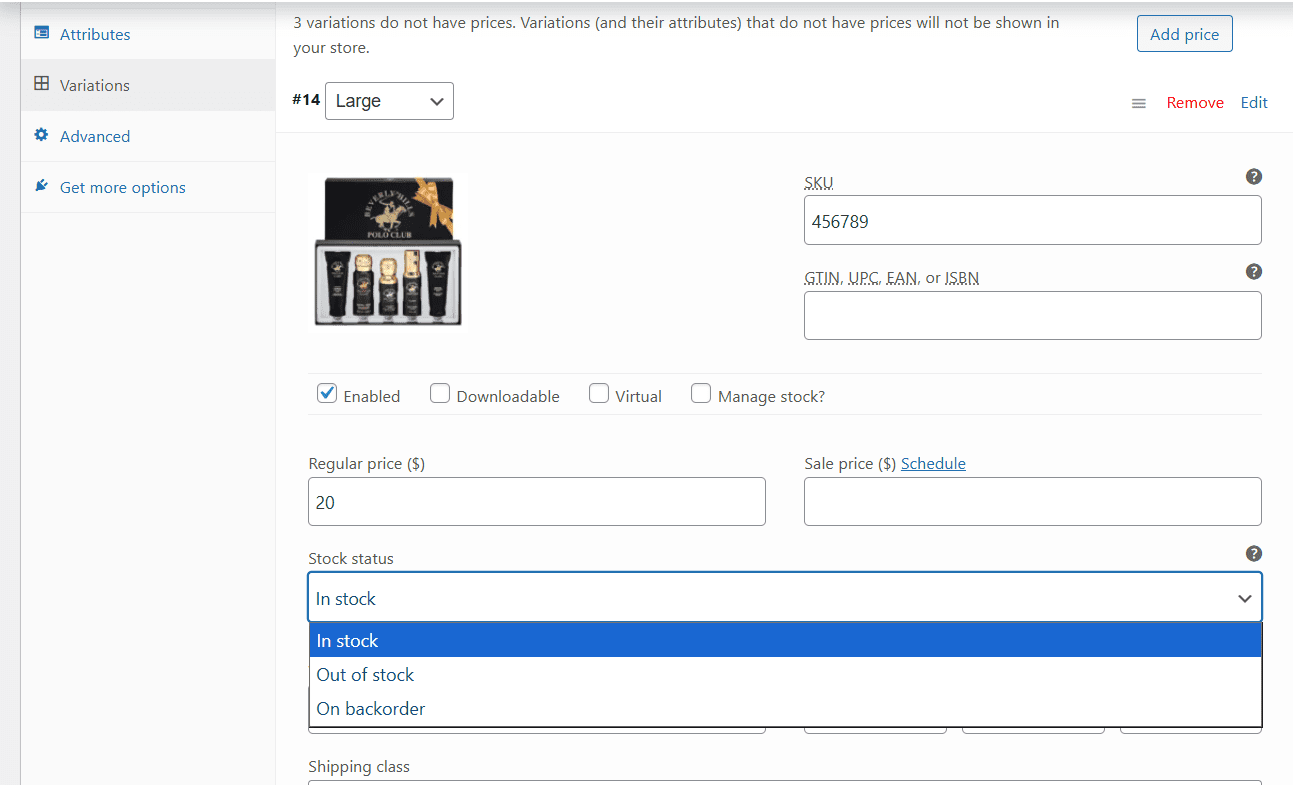
On your dashboard, locate WooCommerce > Products. From there, hover over your product and click on Edit. This will open up a page that allows you to edit multiple fields easily. Locate the “Product Data” panel and the “Variations” tab within. From there, click on one of your variations and head down to the “Stock Quantity” field (provided you have the Manage Stock field selected). Enter your new stock number and scroll down to save changes.
How to edit a Product's Image/s
Step 1: Navigate to Product Edit
- From the left-hand dashboard menu, hover over Products.
- Click All Products.
You will now see the Products page.
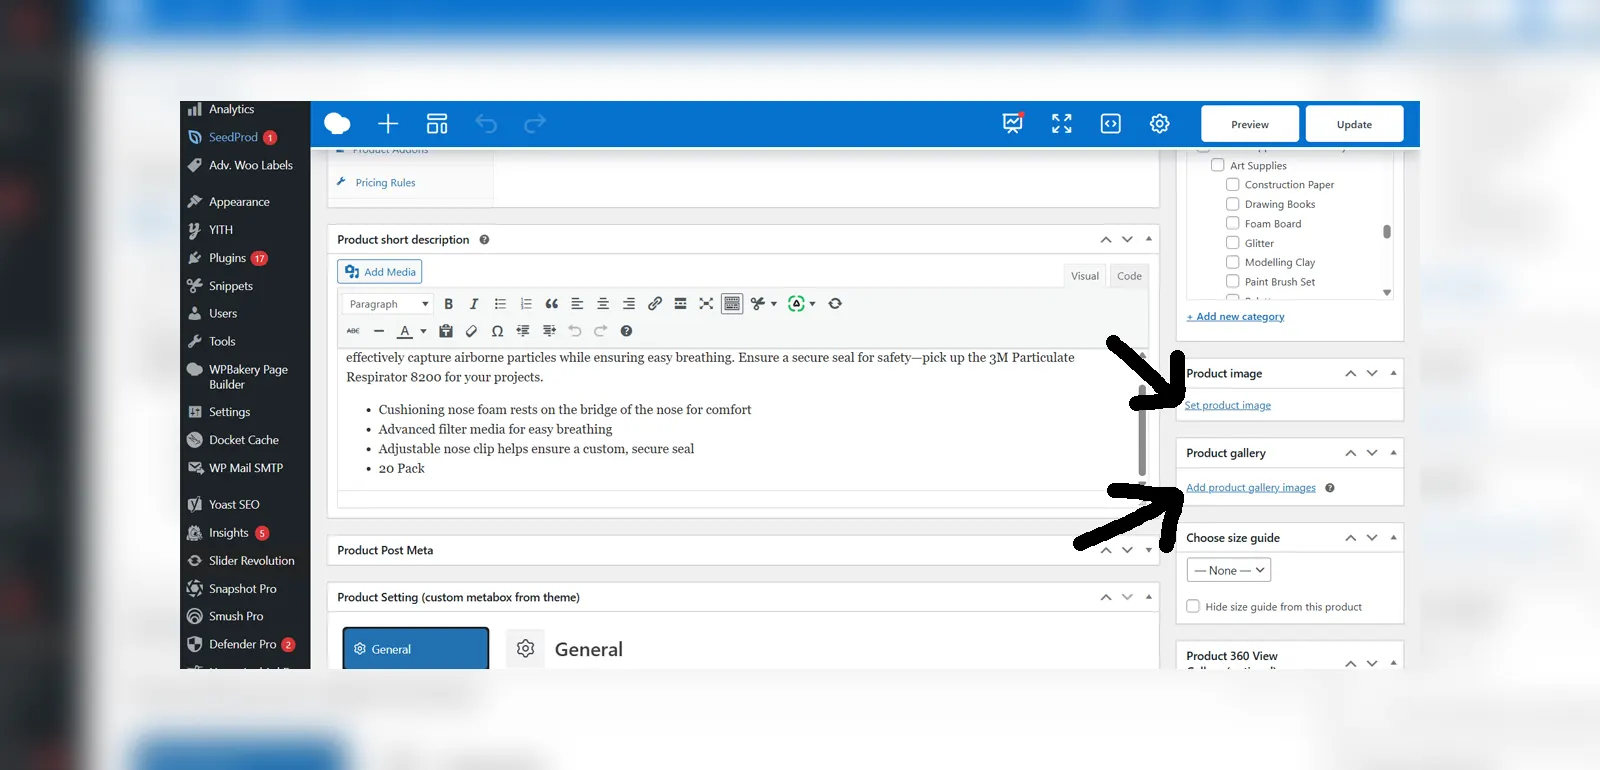
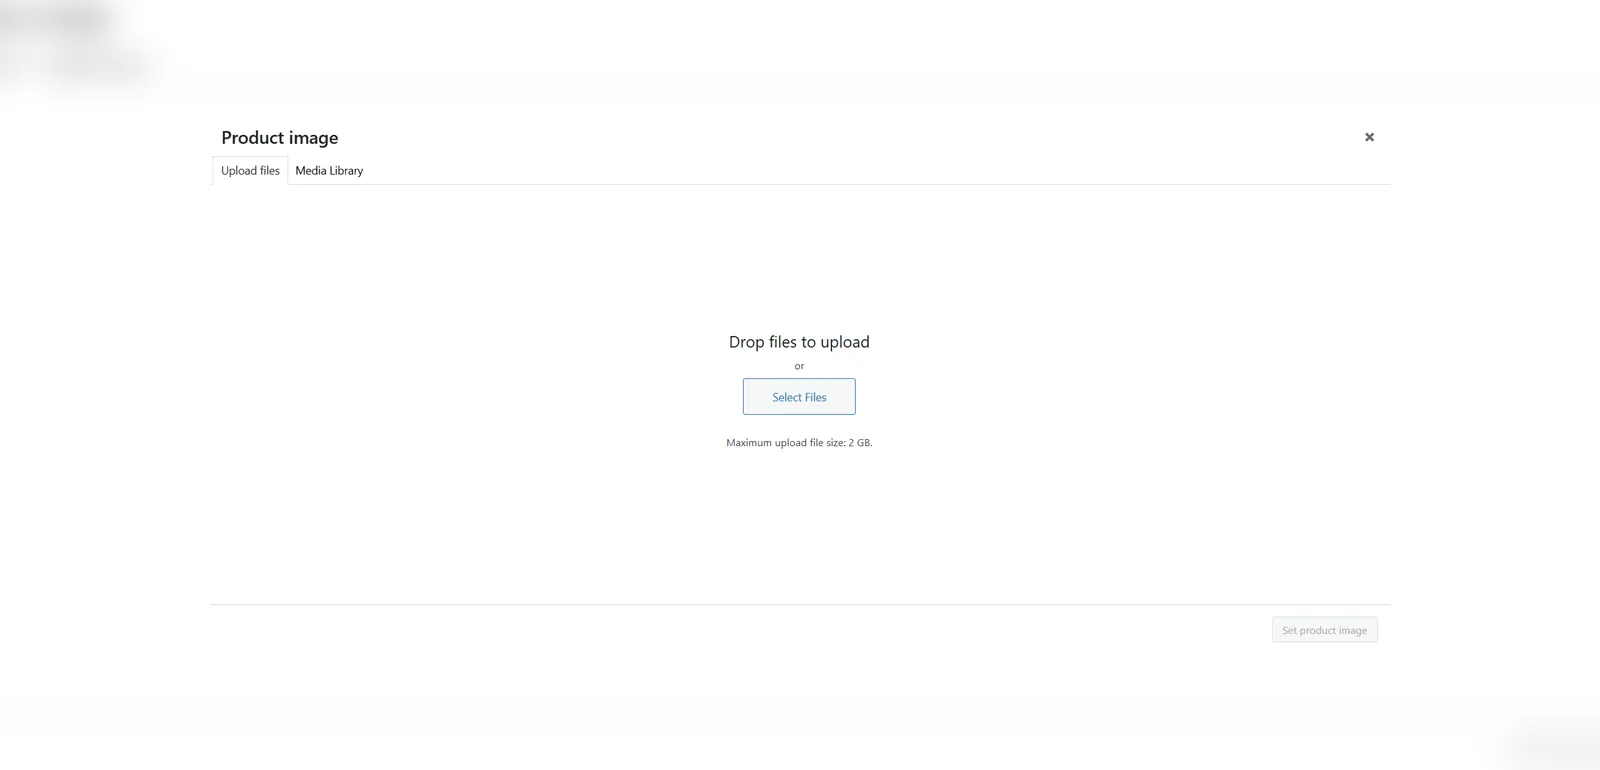
Hover over your product and click Edit. Scroll down to Product Image (usually right below the Update Button). Click on Set Product Image, or if there is current an image, click on that image. This will open up a panel that allows you to select an image from existing images or add your own images by clicking the Upload Files button.
The same can be done for Gallery Images (usually right below Product Image). After selecting your image/images, select the Set Product Image button to save, then click Update.
How to edit Product Categories
Step 1: Navigate to Product Quick Edit
- From the left-hand dashboard menu, hover over Products.
- Click All Products.
You will now see the Products page.
Hover over your product and click on Quick Edit which will open up a panel. On that panel, locate Product Categories. You can add/remove/change a category by clicking on the checkbox next to the category name. After making your changes, click Update to save.

Step 2: Navigate to Product Edit (Optional)
- From the left-hand dashboard menu, hover over Products.
- Click All Products.
You will now see the Products page.
Hover over your product and click on Edit which will open up a page. On that page, locate Product Categories. You can add/remove/change a category by clicking on the checkbox next to the category name. If needed, it is also possible to add a category on this page as well. Simply click on Add New Category, enter a name, a Parent Category (if needed) and then click on the Add New Category button at the bottom to save.
After making your changes, click Update to save.


How to Edit Product Tags
Step 1: Navigate to Product Quick Edit
- From the left-hand dashboard menu, hover over Products.
- Click All Products.
You will now see the Products page.
Hover over your product and click on Quick Edit. From there, a panel will open up. Locate the Product Tags field and enter the keywords associated with your products or make changes to your existing ones. Remember to separate them with a comma where needed. Click Update to save changes.

Step 2: Navigate to Product Edit (optional)
- From the left-hand dashboard menu, hover over Products.
- Click All Products.
You will now see the Products page.
Hover over your product and click on Edit. From there, a page will open up. Locate the Product Tags field and enter the keywords associated with your products or make changes to your existing ones if needed. Remember to separate them with a comma. You can also choose from tags that you already have made by clicking on the Choose from the most used tags link. Click Update to save changes.

How to Edit Product Attributes (Simple Products)
Step 1: Navigate to Product Edit
- From the left-hand dashboard menu, hover over Products.
- Click All Products.
You will now see the Products page.
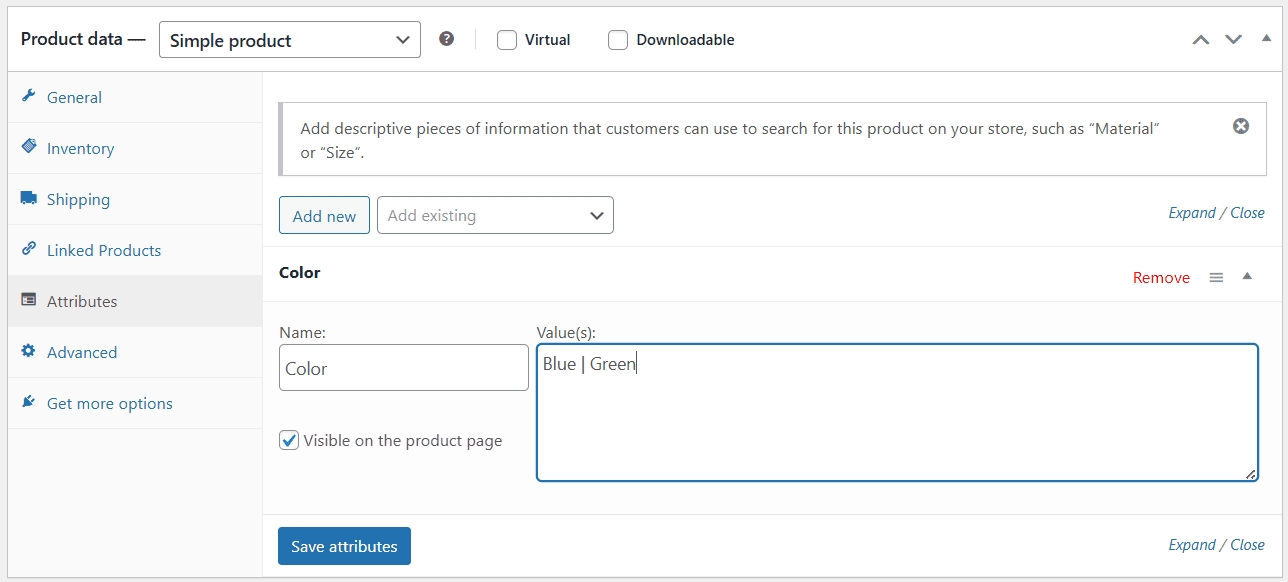
Hover over your product and click on Edit. On the product edit page, locate the Product Data field and click on the Attributes tab. From there, you will be greeted with 3 main options, Add Existing, Add New or edit Current Attributes.
Clicking on Add New will open a panel where you can add an attribute name as well as the values for that attribute.
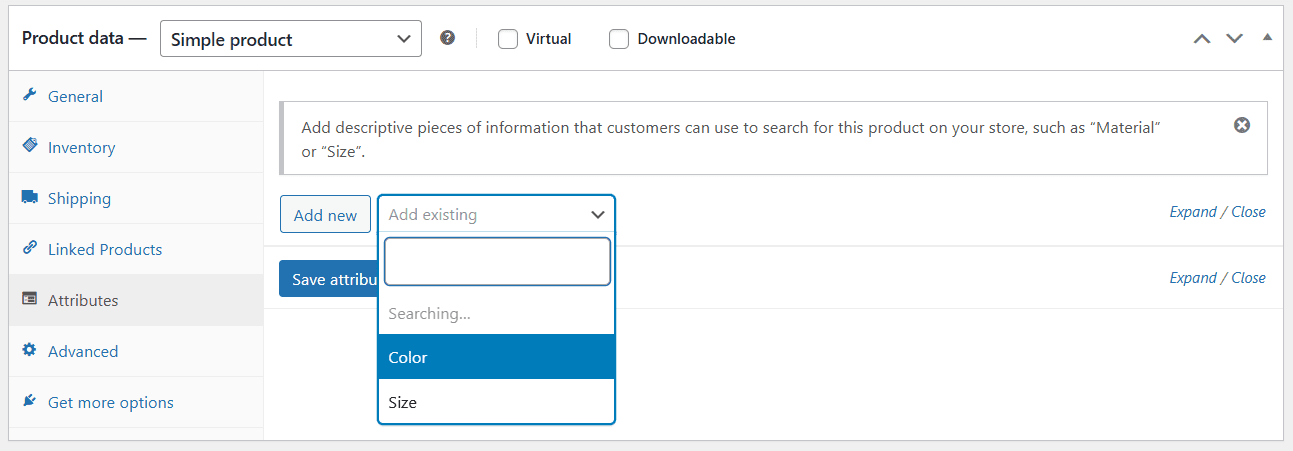
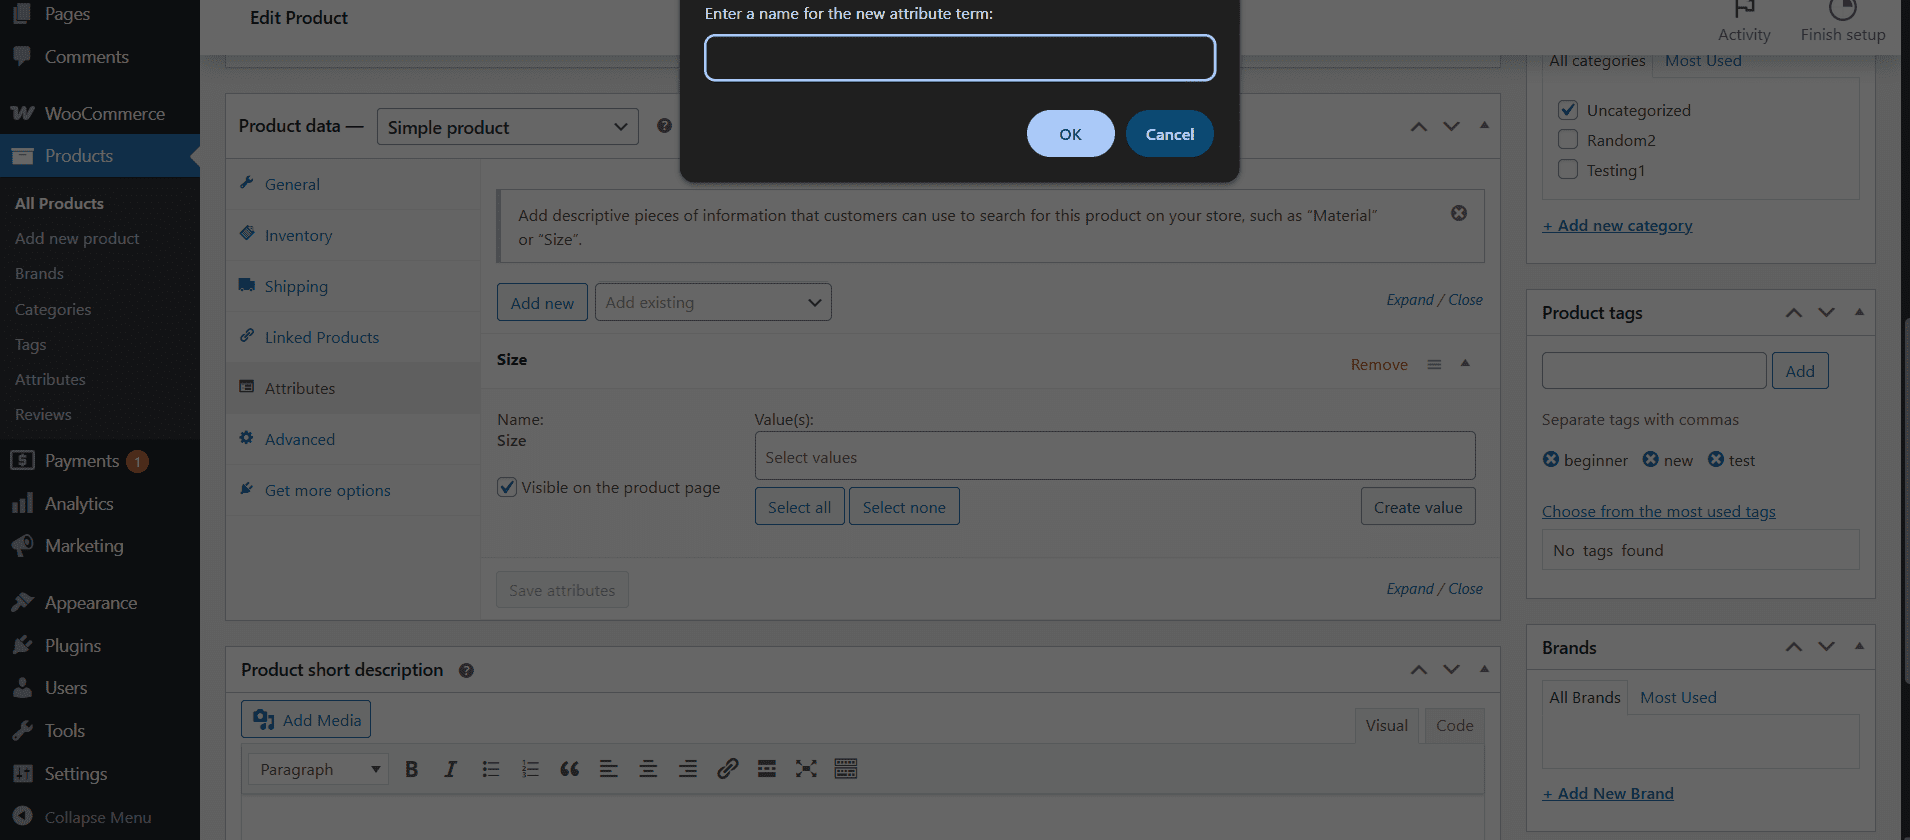
Clicking on Add Existing will open a dropdown/search bar where you can search for an attribute you already have made. From there, click on an attribute to add it, then clicking in the “Select Values” field, you can add the values for the attribute or Create a new value by selecting the “Create Value” button on the right side of the field.
If there is already an attribute present, click on the attribute to open the panel for it. You can edit the name and values there as needed.
Click on Save Attributes to save.
Add New

Add Existing
How to Edit Product Attributes (Variable Products)
Step 1: Navigate to Product Edit
- From the left-hand dashboard menu, hover over Products.
- Click All Products.
You will now see the Products page.
Hover over your product and click on Edit. On the product edit page, locate the Product Data field and click on the Attributes tab. From there, you will be greeted with 3 main options, Add Existing, Add New or edit Current Attributes.
Clicking on Add New will open a panel where you can add an attribute name as well as the values for that attribute.
Clicking on Add Existing will open a dropdown/search bar where you can search for an attribute you already have made. From there, click on an attribute to add it, then clicking in the “Select Values” field, you can add the values for the attribute or Create a new value by selecting the “Create Value” button on the right side of the field.
If there is already an attribute present, click on the attribute to open the panel for it. You can edit the name and values there as needed.
Add New
Add Existing
Step 2: Attribute Usage
After making your attributes, you will see 2 checkboxes under the attribute name. If you want your attribute to be seen on the product page, check the “Visible on the Product Page” box. If you want to use them for Variations, check the “Used for Variations box. Click on Save Attributes once you are finished.
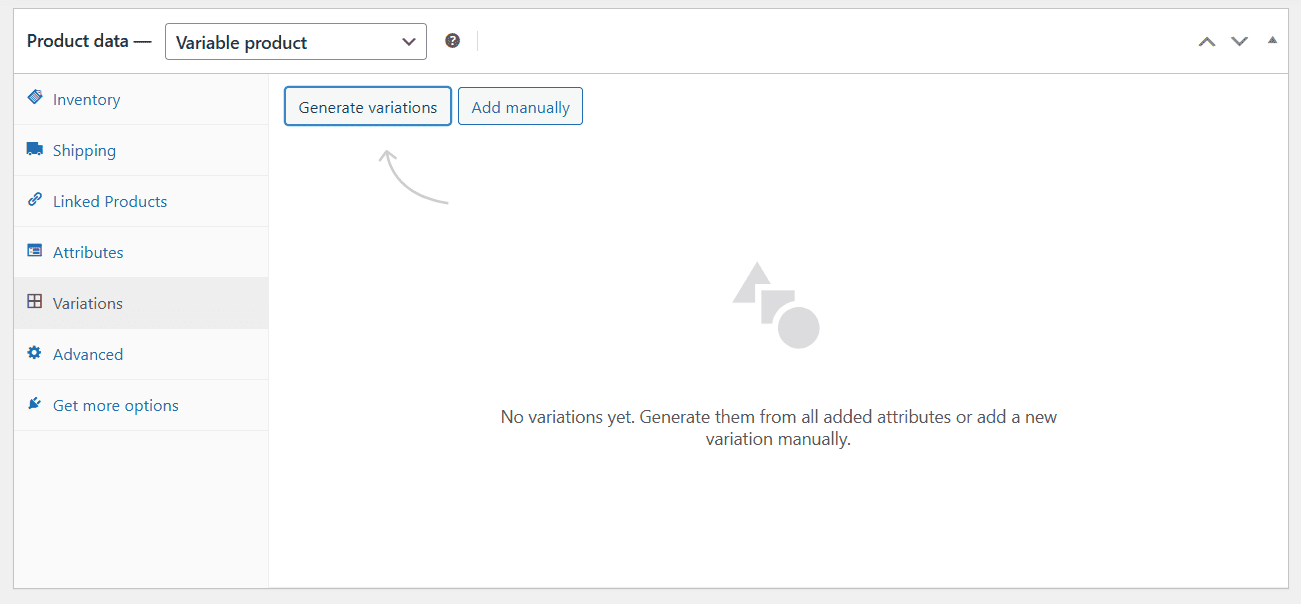
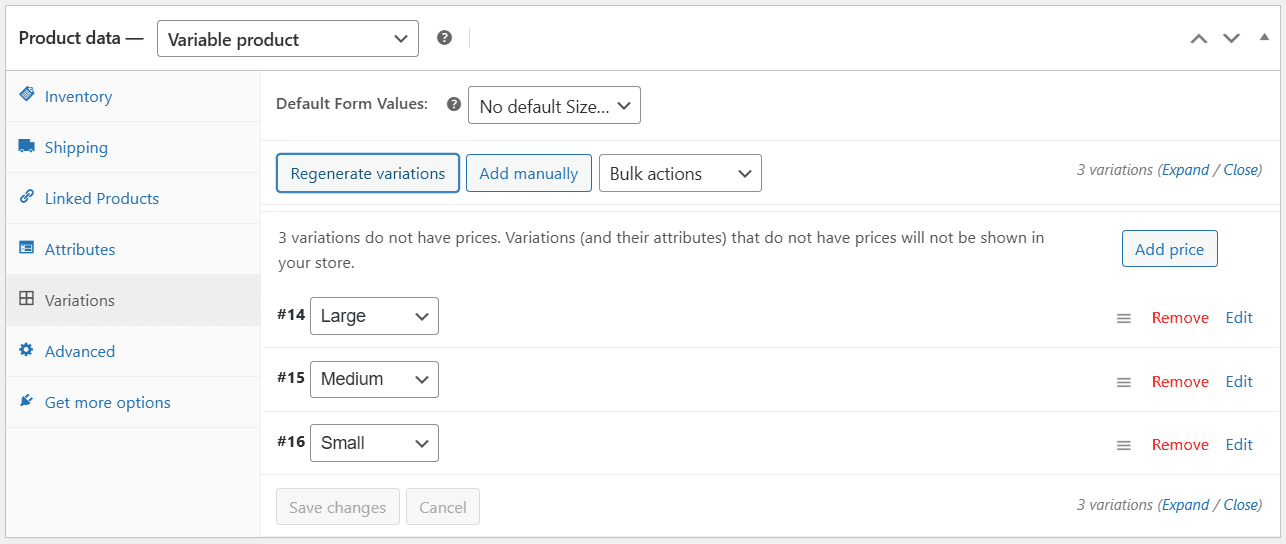
Head to the Variations tab and select either “Generate Variations” to automatically add all variations to the list or “Add Manually” to choose which ones you want to add. From there, you can click on each variation to individually set the Product Image, SKU, Regular Price and Sale Price (if applicable) and Stock Status (or Specific Stock if you have the Manage Stock checkbox selected).
Next to the “Add Manually” button, there is a dropdown that allows you to bulk edit variations if needed. Click the Save Changes button at the bottom after you are done.